For a reasonable placement of things, shelves and racks are needed that are useful in a garage or any warehouse, for example, wholesale products for your store. This design can be easily done independently, which will significantly save money. How to build it yourself and what is needed for this? You will learn about all this in this article.

DIY profile rack
It is important to remember that you should pre-calculate your strength and the presence of certain skills in order to prevent annoying mistakes that will later be difficult to fix. Shelving can be made from different materials, each of which has its own advantages and disadvantages.
From aluminum profile for drywall
Such racks are very light and reliable at the same time and can store a significant amount of things. In addition, they are easy to manufacture and for their manufacture does not require special additional materials.
In conditions when furniture or other property becomes more and more, such designs will be indispensable.

From a profile pipe
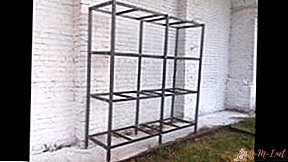
Profile pipe is the most optimal and easy option. It provides reliability and added stability to your shelving. With such home-made furniture, you can significantly save space in an apartment or house, leaving things in the garage.
From metal profile
Such racks are very common. The choice of metal is extremely wide and allows you to make the perfect choice for you so that nothing bothers you during the manufacture and then operation of the rack.
Do-it-yourself shelves from a profile pipe
There is nothing complicated in the manufacture of such shelves. The main thing is to pre-calculate all the sizes and quantities of the required materials, as well as draw up a drawing or diagram with which you will understand the sequence of actions, and also not be mistaken with the dimensions.
IMPORTANT! Very often a garage may also require a workbench, and if you think about the need for this element in advance, you can make it part of the shelving system. This is very convenient, because everything you need will be at hand.
Now we’ll take a closer look at the process of making the shelving and their types in order to choose the one that is ideal for you.

How to assemble a rack from a profile
To decide which design to assemble, it is worth sorting out the possible options.
The main types
 prefabricated - such options are sold unassembled. Manufacturers usually provide detailed assembly instructions, so it rarely causes any problems.
- a rack from a profile is the most reliable option, which is made of durable metal. It can be put anywhere and assemble any size, which is very important for owners of garages and wholesale stores.
- wooden - it is similar in design to the previous one, but the cost of materials is much lower. Unfortunately, such a rack can withstand much less load and has a shorter life compared to metal.
 prefabricated - such options are sold unassembled. Manufacturers usually provide detailed assembly instructions, so it rarely causes any problems.
Preparatory stage
As mentioned above, the very first step will be to draw up a diagram and calculate the required dimensions. In addition, you should pre-purchase all materials and choose a convenient place for work, where everything will be at hand and nothing will distract from the assembly process.
You also need to remove traces of past repairs, in order to subsequently attach the frame of the new shelves and prepare the wall for its installation. It is necessary to primer the surface, putty and cracks and the obligatory marking in accordance with the previously thought out drawing.
Necessary tools
To build, you will need the following tools:
- electrodes
- welding machine;
- drill;
- self-tapping screws;
- saw on wood;
- Bulgarian;
- cutting wheel for metal;
- roulette;
- scriber;
- level;
- drill.
Depending on the size of the future rack, you will need a certain number of profile pipes and wooden boards.
Assembly
 Do not forget to comply with safety requirements before starting work, namely: wear gloves and eye protection. Now you can proceed with the assembly and installation. First, you need to make a frame from the profile. To do this, measure the necessary details on it, cut them out, and then connect them together. Then - the frame directly for the shelves. On the first frame, the places of fastening the shelves are marked, where they are subsequently welded by welding or bolts. The next step will be rust treatment and painting of the finished frame. It remains only to make shelves and fasten them with screws. Wooden shelves must first be painted and thoroughly dried. The rack can also be attached to the ceiling or to the wall. For this you need brackets, spacers and anchors. Now you know how to assemble a rack with your own hands and what it will take.
Leave Your Comment