 The chest of drawers can be not only made of wood, but even made of cardboard. But, it is worth noting that the independent manufacture of furniture from this material should be in accordance with all the rules. This is because cardboard is not as durable as wood.
How to make a chest of drawers
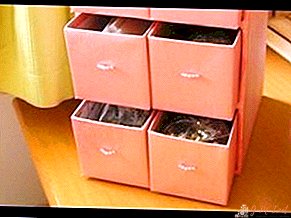
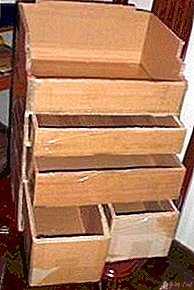
There are many options for implementation. You can just take cardboard paper, cut walls and shelves out of it, make boxes and glue everything. And you can take a ready-made box (for example, from the refrigerator), and put smaller boxes in it (this design will be strong enough, since the walls of the cardboard are thicker).
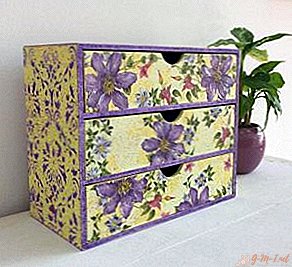
To give a beautiful appearance to the material, it can be pasted over with colored paper, wallpaper or pictures. With a good external processing of such furniture, guests will not be able to believe that the chest of drawers is really made of paper.
What should be cardboard
To create furniture, there are a number of material requirements. They are as follows:
- The material should not be wet. If water gets on it, it must be dried before starting work.
- Cardboard paper must be environmentally friendly. If mold or fungus appears on it, then the material is not allowed to be used, since it can be harmful to health. In addition, such a material will not be durable, and after a while the design will break.
Important! If the cardboard is high-quality and durable, but it has a bad appearance, it can always be fixed with paper.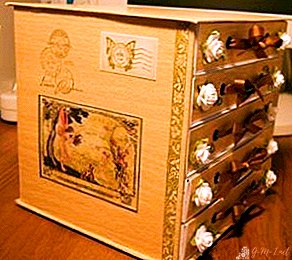
Pros and cons of such material
Cardboard has the following advantages:
- Strength. If the material is high-quality, and the work was done at a good level, the chest of drawers will be able to withstand heavy loads.
- Availability. Such material is very cheap. But you can do everything without spending money if the house has a large supply of unnecessary cardboard.
- Environmental friendliness. Cardboard is a clean material that does not pollute the environment and does not cause harm to health.
- The form. Thanks to flexibility, it is possible to make designs of any kind.
Such material is able to satisfy any fantasies, and you can experiment on it.
Cons are the following:
- As a material, he will not be able to last too long. Service life no more than 10 years.
- It spoils when water gets in. Therefore, it cannot be put into a room with high humidity (in the bathroom).

What tools are needed
It all depends on which particular chest of drawers is needed, you will need:
- Cardboard. There is a single layer, two layer and three layer. The latter is the most durable, and suitable for storing heavy things. As a rule, cardboard is bought in the form of boxes, inside which something is packed. It can be purchased at a hardware store, or other household items.
- Glue gun. It can be replaced with ordinary glue. Nevertheless, the gun is more convenient to use, especially if you are constantly making cardboard furniture. If you are staying on a gun, you need to buy several sticks of glue in advance to reload the gun.
- Kraft paper. It will help to assemble parts from cardboard, and smooth the edges. Kraft can also be used for decoration.
- Scissors.
- Cutter. Additional blades must be purchased in advance, as they quickly become dull upon contact with such material.
- The rule. It is necessary to cut parts along lines.
- Plain paper. Needed to remove uneven surfaces.
- Sponge.
- Sandpaper. To smooth the corners of the material.
- Construction tape.
- Acrylic paint (to cover cardboard). Do not use enamel, as it will ruin the material.
- Varnish for coating.
- Adhesive tape for sealing edges.

Attention! The list of materials listed above is not final. In the individual case, additional materials (carpentry glue, or a board for working with cardboard) may be needed. Also, to create the simplest chest of drawers, not all of the materials listed above will be used.
The process of creating a chest of drawers
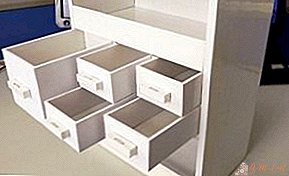
If there is no experience in creating cardboard furniture, it is recommended to make a simple model with your own hands. The classic model is a square with several drawers.
Step-by-step instruction:
- Create a sketch on paper. Set the dimensions depending on the place where the structure will stand. It is necessary to determine in advance the size and number of blanks.
- It is necessary to cut the blanks of the walls of the dresser. They should be thick, as this is the basis of the whole structure. Glue them together. The surfaces are joined by glue moment. For the structure to grip well, place it under the load for a couple of hours.
- Stick on the parts, leaving spaces where the shelves will be installed. It is necessary that the size of the groove corresponds to the height of the shelf.
- Assemble the base and you can insert the shelves.
- It is necessary to glue the edges with tape to preserve the strength of the structure.
- Now you can make boxes, if sizes allow, you can use ready-made boxes from under household items or shoes. If there are no ready-made boxes, you need to do everything the same way as with the base - cut them according to the sketch and glue them.
- Before inserting the boxes, the base must be well dried and allowed to stand. Now you can insert boxes. To make a dresser more beautiful, it can be covered with colored paper or various pictures.
- At the end of the work, the chest of drawers should be varnished to protect it from external damage.
- The design is ready. You can use it.

Creating a chest of drawers from cardboard paper is quite simple. The most important thing is to make the correct layout and sketches, because most of the mistakes are made at this step.
Leave Your Comment